Unlock Endless Yellow Blooms: How to Propagate Forsythia from Cuttings
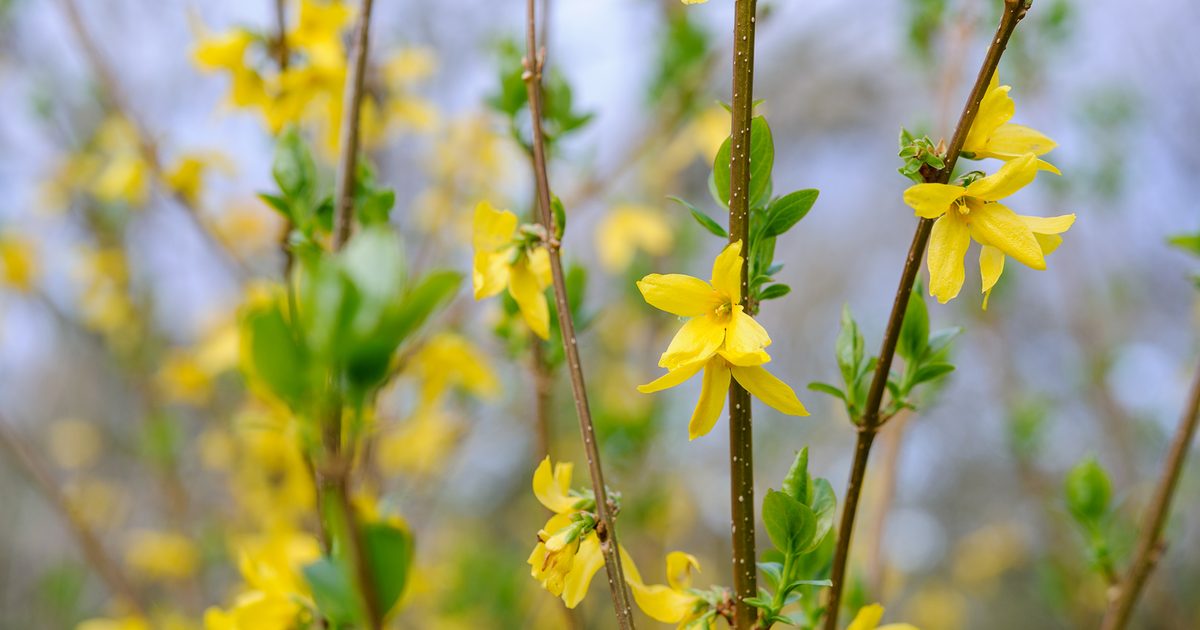
Imagine your garden bursting with cascades of cheerful golden-yellow flowers, signaling the official arrival of spring. That's the magic of forsythia! These vibrant shrubs are a true harbinger of warmer days, and once you have one, you'll likely find yourself wishing for more. The good news? Propagating forsythia is remarkably easy, even for novice gardeners. You can effortlessly expand your collection of these joyful plants, filling your landscape with their stunning display without breaking the bank.
My own journey with forsythia began with a single, tiny plant years ago, which rapidly transformed into a magnificent, towering bush. Its annual explosion of sunny blooms brought such delight that I couldn't resist adding more to our backyard. Now, with large, thriving specimens, I'm ready to spread that golden cheer even further across our property. If you're wondering
how to propagate forsythia to achieve your own garden dreams, you're in the right place. This comprehensive guide will walk you through every step, ensuring you achieve a high success rate and a garden full of those happy, golden flowers.
Why Forsythia is Your Ideal Propagation Project
Forsythia truly stands out as a gardener's dream for propagation. Their inherent hardiness and remarkably fast growth rate make them incredibly forgiving and rewarding subjects. You can start with what seems like an insignificant cutting and, within a year or two, witness it mature into a substantial shrub, ready to dazzle with its early spring blossoms. This rapid development means less waiting and more enjoyment of your expanding yellow paradise.
The species, including cultivars like 'Northern Gold' Forsythia (Forsythia ovata), are renowned for their adaptability. 'Northern Gold', for instance, thrives in a wide hardiness range (Zones 2-9), tolerates various well-drained soil types (loam, sand, clay, or humus-rich), requires only average watering, exhibits impressive drought resistance, and flourishes in full to partial sun. These robust characteristics translate directly into a high success rate when you embark on the journey of
how to propagate forsythia from cuttings. Their vigor means the cuttings are eager to root and grow, making the process both simple and incredibly satisfying.
Essential Tools and Optimal Timing for Forsythia Propagation
Before you dive into the exciting world of multiplying your forsythia, gathering the right tools and understanding the perfect timing are crucial for success. These preparations lay the groundwork for healthy root development and robust new plants.
Your Essential Toolkit:
*
Planters: You'll need containers to house your young cuttings. Options include a long planter box, several smaller individual pots, or a specialized seed-starting tray with multiple sections. Choose what best fits your space and desired quantity.
*
Potting Mix for Cuttings: Look for a high-quality potting mix specifically formulated for cuttings or seed starting. These mixes are typically lighter, well-draining, and provide the ideal balance of moisture retention and aeration needed to prevent rot and encourage root growth. Avoid heavy garden soil.
*
Clean, Sharp Pruning Shears: This tool is non-negotiable.
Clean, sharp shears ensure a precise, clean cut, which minimizes damage to the parent plant and the cutting itself. A clean cut heals faster and reduces the risk of disease. Always clean your shears with rubbing alcohol or a bleach solution before and after use, and keep them sharpened for optimal performance.
*
Rooting Hormone (Optional but Recommended): While forsythia can root without it, a rooting hormone (typically a powder) significantly boosts your success rate by stimulating faster and stronger root development. It's a small investment that pays off immensely.
*
Small Bowl of Warm Water: Used for dipping cuttings before applying rooting hormone.
The Golden Window for Propagation:
Timing is paramount when considering
how to propagate forsythia successfully. Aim to take your cuttings sometime between
May and early July. This period is ideal for several reasons:
*
Post-Bloom, Pre-Hardening: You want to wait until the dazzling yellow flowers have faded and the leaves have fully emerged. This ensures the plant's energy is no longer directed towards flowering but towards vegetative growth.
*
New, Vigorous Growth: By May-July, the plant will have produced plenty of new, bright green, softwood growth that is perfectly pliable and ready to root. Older, woody stems from the previous year are much less likely to succeed.
*
Ample Growing Season: Taking cuttings within this window provides your new plants with plenty of time to develop a strong, established root system before the colder temperatures of winter set in. Strong roots are essential for overwintering successfully.
Step-by-Step Guide: How to Propagate Forsythia Cuttings
With your tools ready and the timing just right, let's get down to the practical steps of turning a small clipping into a thriving forsythia bush. For more in-depth insights into the tools and specific cutting techniques, refer to
Your Guide to Forsythia Cuttings: Timing, Tools, and Techniques.
1. Prepare Your Potting Mix:
* Begin by filling your chosen containers (planter box, pots, or seed trays) with the specialized potting mix.
*
Moisten the mix thoroughly. You want it to be evenly moist, like a wrung-out sponge – damp but not waterlogged or soggy. If using fresh mix from a bag, it's often perfectly moist already. Adequate moisture ensures the cuttings don't dry out but also prevents fungal issues.
2. Select and Make Your Cuttings:
* Scout your forsythia bush for
new growth from the current year. These branches will be bright green and supple, distinct from the browner, woodier growth of last year. This "softwood" is prime for rooting.
* Using your clean, sharp pruning shears, clip pieces that are approximately
four to six inches in length.
*
Take more than you think you need! A good rule of thumb is to cut about twice as many branches as the number of plants you ultimately desire. Propagation isn't always 100% successful, and it's better to have a few extra than to wait another year to try again. Look for the healthiest, most vigorous stems.
3. Prepare the Cuttings for Planting:
* Carefully remove all leaves from the
bottom two inches of each cutting. This prevents the leaves from rotting when buried in the soil, which could lead to fungal diseases. It also directs the cutting's energy towards root production rather than sustaining existing foliage.
* Dip the leafless bottom two inches of each cutting into your bowl of warm water. This moistens the stem, helping the rooting hormone adhere better.
* Next, dip the same bottom two inches directly into the rooting hormone powder. Gently tap off any excess, ensuring an even coat around the stem. This hormone provides the essential compounds needed to stimulate rapid root formation.
4. Plant Your Cuttings:
* Using a pencil or a similar tool, create small holes in the prepared potting mix. This prevents scraping off the rooting hormone when inserting the cutting.
* Carefully insert each prepared cutting into the potting mix, ensuring the bottom two inches (where leaves were removed and hormone applied) are completely buried.
* Gently firm the soil around each cutting with your fingers. This ensures good contact between the cutting and the potting mix, which is vital for moisture uptake and root development.
5. Initial Response and Care:
* Don't be alarmed if some of your cuttings appear a bit droopy or wilted shortly after planting. This is a common response to being separated from the parent plant and losing some moisture. Most will perk right back up within a few hours or a day once they've had a chance to absorb water from the moist soil.
Post-Propagation Care and What to Expect
Once your forsythia cuttings are nestled in their new homes, consistent care is key to nurturing them into strong, independent plants.
*
Location: Place your planters in a location that receives bright, indirect light. Avoid direct, scorching sunlight, which can quickly dry out and stress the young cuttings. A shaded porch, a bright window with filtered light, or under a grow light (set to a gentle intensity) works well.
*
Watering: Maintain consistent moisture in the potting mix. Check the soil daily; it should always feel damp, but never soggy. Overwatering can lead to rot, while allowing the soil to dry out completely will kill the fragile young roots. A misting bottle can also help maintain humidity around the leaves.
*
Humidity: For an extra boost, consider creating a humid environment. You can place a clear plastic dome or even a clear plastic bag loosely over the planter, supported by stakes so it doesn't touch the leaves. This traps moisture and mimics the conditions favorable for rooting. Just remember to occasionally lift the cover for a few minutes to allow for air circulation and prevent mold growth.
*
Root Checking: Be patient! Rooting can take anywhere from 3-6 weeks. After a few weeks, you can gently tug on a cutting. If you feel resistance, it's a good sign that roots are forming. Avoid pulling too hard, as this can damage tender new roots.
*
Transplanting: Once your cuttings have developed a robust root system (indicated by good resistance when tugged, or even roots emerging from the drainage holes), they are ready for transplanting. You can move them into larger individual pots for further growth or, if the weather is appropriate and they've been hardened off, directly into their permanent spot in the garden. Hardening off involves gradually acclimating the young plants to outdoor conditions over a week or two.
Troubleshooting and Tips for Higher Success Rates
Even with the best intentions, propagation can sometimes present challenges. Here are some tips and common issues to watch out for to ensure a high success rate as you
propagate forsythia: grow more fast-growing yellow shrubs.
*
Yellowing or Dropping Leaves: If leaves turn yellow and fall off rapidly, it might indicate overwatering (leading to rot) or underwatering (stress). Check soil moisture carefully. It can also be a natural shedding as the plant focuses energy on root production.
*
No Rooting: If after several weeks you see no signs of roots, factors could include insufficient warmth, lack of humidity, or the use of older, woody stem material. Ensure your cuttings are in a warm spot (bottom heat mat can be beneficial), maintain humidity, and verify you used current year's softwood.
*
Mold or Fungus: Excessive humidity without adequate air circulation can lead to mold. If using a humidity dome, lift it periodically to allow fresh air in. Ensure your potting mix is well-draining.
*
Maintain Warmth: Cuttings root best in warmer temperatures, ideally between 65-75°F (18-24°C). If your indoor space is cool, a seedling heat mat can significantly improve rooting speed and success.
*
Consistency is Key: Consistent moisture, consistent temperature, and consistent light are far more beneficial than fluctuating conditions.
*
Don't Rush: Be patient. While forsythia is a fast grower, root development takes time. Resist the urge to constantly check or disturb the cuttings.
Conclusion: Your Golden Future Awaits
Successfully propagating forsythia from cuttings is an incredibly rewarding experience that allows you to effortlessly multiply these magnificent, spring-flowering shrubs. From a few carefully selected bright green stems to a garden overflowing with cheerful yellow blooms, the process is straightforward, cost-effective, and deeply satisfying. By following these steps – from choosing the right tools and timing to providing diligent post-propagation care – you'll soon be enjoying an "endless" supply of forsythia, transforming your landscape into a vibrant, golden spectacle every spring. So go ahead, grab those shears, and embark on your journey to a more radiant garden!